How to Connect to Supermicro’s IPMI Web Interface, Launch the Java KVM Console, and Mount an ISO
IPMI, which stands for Intelligent Platform Management Interface, is a standardized interface used in server management. It is designed to provide out-of-band monitoring and control capabilities for servers, regardless of the state of their operating systems or applications. IPMI allows system administrators to remotely manage servers, perform diagnostics, monitor hardware health, and control power and cooling functions.
IPMI has become an essential component in server management, providing a powerful toolset for administrators to monitor, control, and troubleshoot servers remotely. It simplifies data center operations, reduces downtime, and contributes to overall system stability and reliability.
Most commonly, it is used by 1GServers clients to remotely install an operating system.
In this tutorial, we will walk you through the process of connecting to Supermicro’s IPMI web interface, launching the Java KVM (Keyboard, Video, Mouse) console, and mounting an ISO image. These steps will enable you to remotely install an operating system or run diagnostic tools on your server.
Note: Please ensure that you have Java Runtime version 7u80 installed on your system for optimal compatibility. While highly out of date, it provides the most reliable compatibility available. It is also important to note that the security level in the Java control panel on your computer will need to be set to the lowest setting.
Before proceeding, you will need to request IPMI access at the 1GServers helpdesk. For security purposes, the IPMI interface is behind a firewall. It is necessary for your computer’s public IP address to be allowed through our firewall.
Step 1: Connect to Supermicro’s IPMI Web Interface for your dedicated server
- Open a web browser on your computer and enter the IP address of the IPMI interface. This information is provided to you by the 1GServers helpdesk technician that granted you access.
- You will be prompted to enter your IPMI username and password. Provide the appropriate credentials and click “Login” to proceed.
Step 2: Launch the Java KVM Console
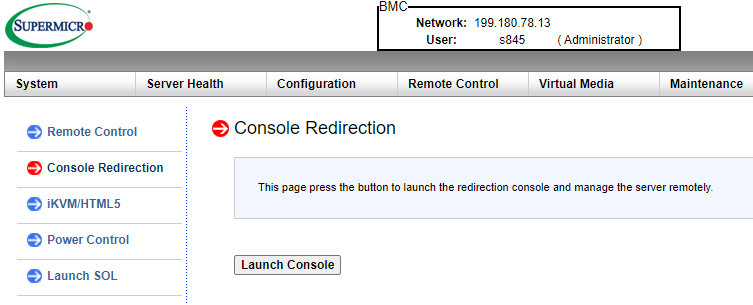
- After successfully logging in, locate the “Remote Control” tab or section in the IPMI web interface.
- Click on the “Console Redirection” or similar button to launch the Java KVM console. Ensure that Java is enabled in your browser and any pop-up blockers are disabled for the IPMI web interface.
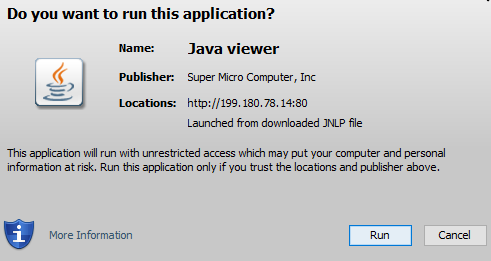
- Depending on your browser, you may see a security warning or prompt asking for permission to run the Java application. Grant the necessary permissions to proceed.
Step 3: Mount an ISO Image
- With the Java KVM console launched, you should now see the remote display of your server.
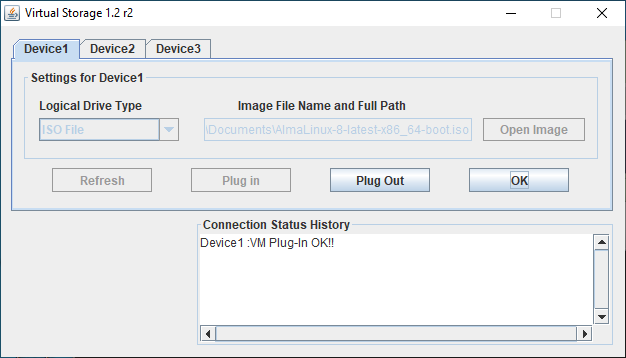
- Goto the Virtual Media menu and select the Virtual Storage option. A menu will popup allowing you to mount an ISO file that is located on your computer.
- Power on or restart the server. During the boot process, press the appropriate key (usually F11) to access the boot menu or boot device selection.
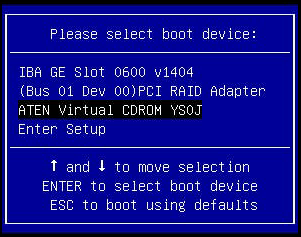
- In the boot menu, select the virtual CDROM or virtual media option. This will allow the server to boot from the virtual CDROM drive, using the ISO you previously mounted.
Note: The screenshots provided in this tutorial are for illustrative purposes and may vary slightly depending on your specific IPMI interface version.
Are you in search of reliable and high-performance dedicated servers? Look no further than 1GServers.com! Our dedicated server solutions are designed to meet the demanding needs of businesses and individuals who require robust computing power, exceptional reliability, and scalable resources. Every 1GServers dedicated server comes with IPMI access upon request.
With 1GServers.com, you can experience the benefits of owning a dedicated server without the hassle of managing and maintaining the hardware yourself. We offer a wide range of server configurations to cater to your specific requirements, whether you need powerful processors, ample storage, or extensive memory. Our state-of-the-art data center provides a secure and optimized environment for the dedicated servers, ensuring maximum uptime and uninterrupted operation. Backed by our knowledgeable support team, you can trust 1GServers.com to deliver top-notch performance, flexibility, and peace of mind for your hosting needs. Discover the power and reliability of our dedicated servers today!
Ready to get started now? 1GServers offers industry leading automated server deployment technology to have your dedicated server available for you within 20 minutes. Visit our Auto Deploy Servers page to get started.
Alternatively, we also offer fully customizable dedicated servers, which are generally setup between 12-48 hours, depending upon options selected.

Benefits, misconceptions and optimizations for 10Gbps dedicated servers with 1GServers.com

Ubuntu 22.04 LTS now supported!

Mastering Linux dedicated server optimizations to maximize CPU and disk performance
About Author
Brandon
Managing and founding member of 1GServers, LLC, Brandon is a Linux systems administration expert. He has helped hundreds of businesses solve their hosting server needs with 1GServers since 2012.