
Introducing 1GServers’ New IPMI System
Getting Started with 1GServers VPN-Enabled IPMI
We will be rolling out updates to our servers’ IPMI info in waves, so at the beginning, many servers will still be using the old way of gaining IPMI access through ticket submissions. The goal is to eventually move all of our servers over to this new system.
Our new IPMI system lets you securely access your servers’ management interfaces through WireGuard. You can create VPN access for your entire account or limit a configuration to one server, manage existing configurations, and access ISO images for remote installations.
1. Install WireGuard
Download and install WireGuard for your operating system from the official WireGuard website.
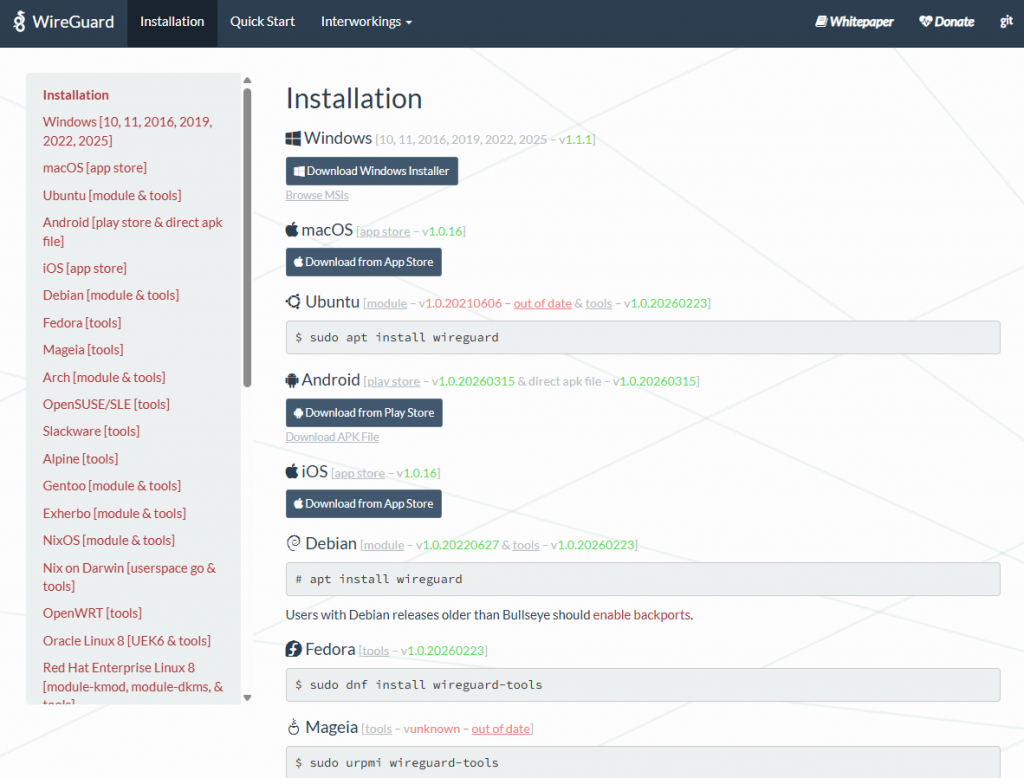
You’ll use WireGuard to import the configuration file generated through the 1GServers VPN page and connect to your servers’ private management network.
2. Choose Your VPN Access
On the left-hand side in your client portal, click on IPMI remote access and then select the remote access manager and log in to the portal. All servers on your account that are available through the new system will appear here. Each server tile displays:
- The server’s private IPMI address.
- Its IPMI username and password, with controls to reveal or copy them.
- An Open IPMI button.
- Controls on the right to generate or revoke a server-specific VPN configuration.
There are two types of configuration:
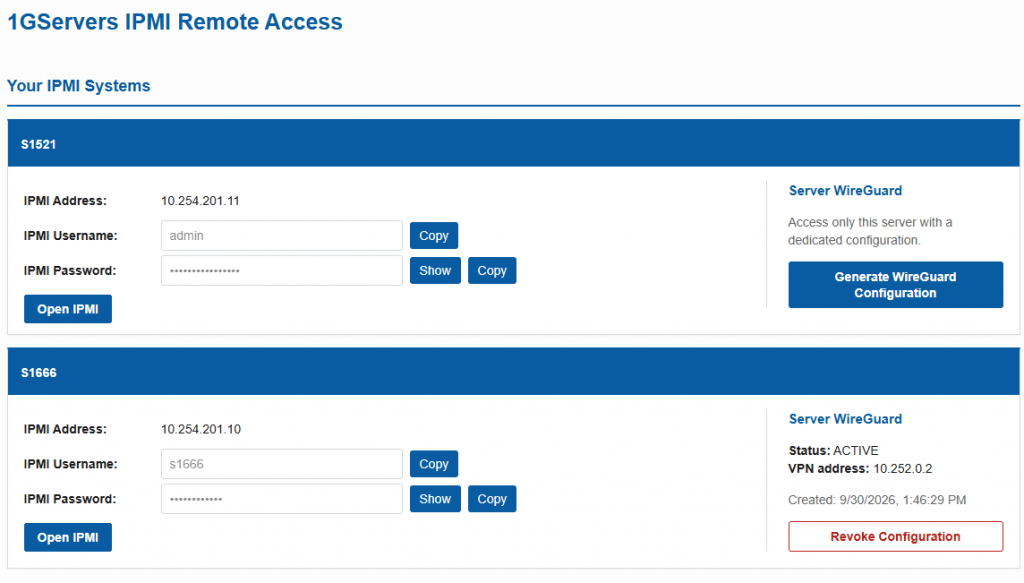
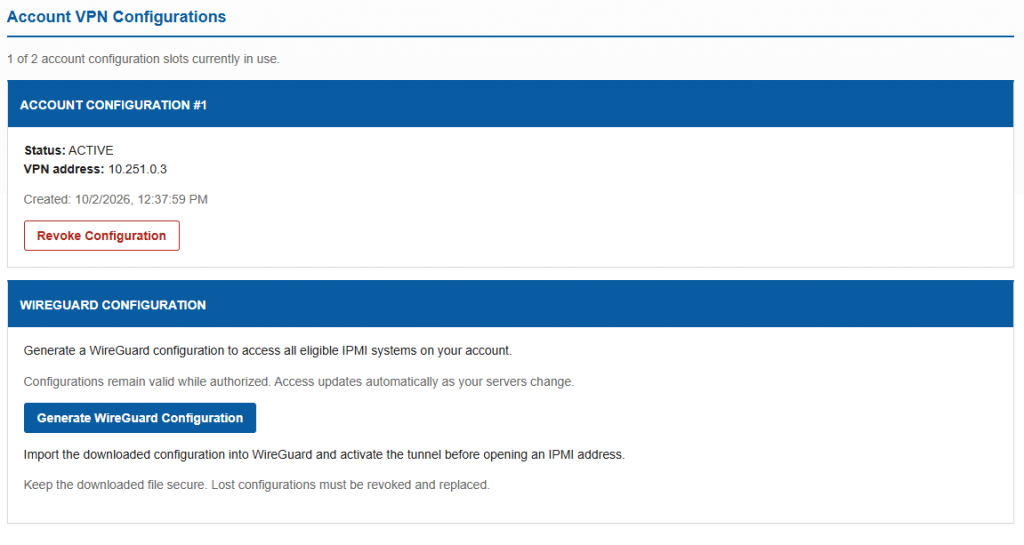
Download the generated .conf file and keep it somewhere secure.
3. Connect and Open IPMI
On a desktop computer:
- Open WireGuard.
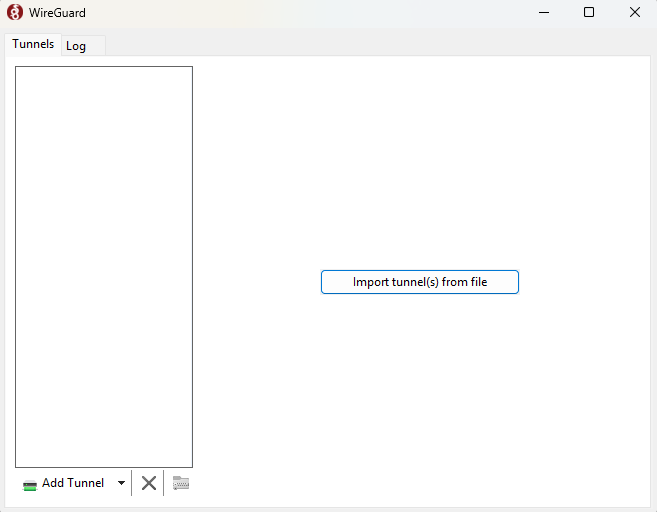
3. Select the .conf file you downloaded.
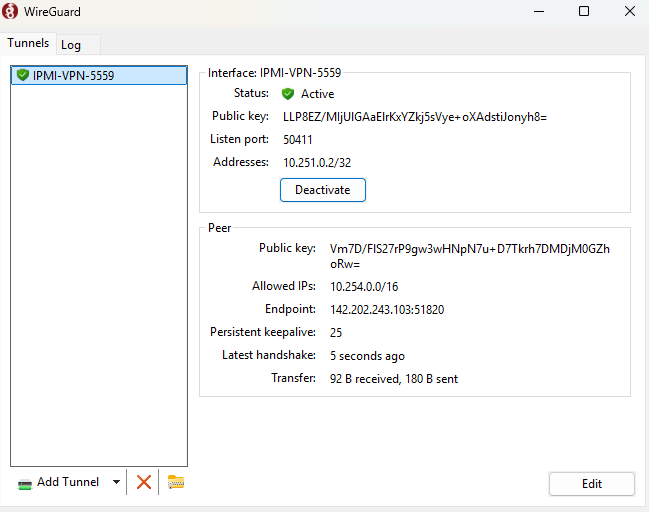
5. Return to the 1GServers VPN page and click Open IPMI for your server.
6. Sign in using the IPMI credentials displayed in the server tile.
WireGuard must be active before you can reach the private IPMI address. Importing a configuration alone does not establish the connection.
When you’re finished, you can deactivate the WireGuard tunnel. Deactivating it disconnects your computer without revoking the configuration, so you can activate it again later.
How Access Updates
Configurations are persistent—you do not need to generate a new one every time you connect. For account-wide profiles, access to newly added eligible servers is updated automatically during the next successful ownership verification, normally within 12 hours. Your existing configuration continues to work; no replacement download is required.
To use an image:
- Select a common ISO or upload your custom ISO and wait for it to become available.
- Open your server’s IPMI interface while connected to WireGuard.
- Follow the Supermicro mounting instructions shown in the portal.
- Copy the displayed share host, image path, and any required credentials into the corresponding virtual-media fields.
- Save the settings and mount the image.
- Select the virtual CD/DVD as the boot device when you’re ready to start the installation.
Selecting or uploading an ISO does not mount it automatically—you must complete the mounting steps in IPMI.
Custom ISOs are removed from our storage server after 24 hours. Complete your installation before the image expires, and unmount it when you’re finished.
If you cannot open IPMI, first confirm that WireGuard is active and that your chosen configuration covers the server you’re trying to access. If you still need assistance, contact 1GServers support with the server name and the error you’re seeing.

Ubuntu 22.04 LTS now supported!

Unveiling the Advantages of 1GServers Dedicated Servers

Experience Unmatched Performance with Ryzen 7950X3D Dedicated Servers at 1GServers
About Author
